Pages

Saturday, November 2, 2013

Genetic Roulette: The Gamble of Our Lives

The hour-long educational documentary "Genetic Roulette: The Gamble of Our Lives" is viewable for FREE this week at the above link. If you have wondered if eating organic is all just a big marketing scheme, or have wondered if it's really worth it to go non-GMO and organic in your home, this video will help you answer that question.

It is incredibly sad what terrible stewards we people have been of the world that God gave us. When we feel the consequences of this in our health, and see it impacting our ability to serve God and others, and then we realize the importance of this stewardship.

I have to confess, finding non-GMO, organic food can be difficult and expensive. Sometimes I have doubted whether it was really worth it. But having experienced so many of the health issues mentioned in this video ourselves, the significance of this issue has hit home. It is less costly in the long-run to pay  for health now than to pay for sickness later.

Also important to consider is who and what you want to support when you visit the grocery store. The big biotech and processed food industries have shown a tremendous lack of integrity in the way they do business. It's worth considering whether you can support them in good conscience.

Watch this video and pass it on. Homeschooling moms - use it as an assignment to teach your children good nutrition. Vote for GMO labeling when you get the chance. More importantly, vote with your money each time you shop. Find the local farmers in your area who are doing business with integrity - sustainably and transparently - and give them your business.

"Genetic Roulette" Trailer

Tuesday, October 22, 2013

Oodles of Noodles & Other Fun Food - WEEK 31/Full GAPS Diet

My husband and I continue to enjoy vastly improved symptoms with the full GAPS diet. My energy level continues to stabilize and increase, and my husband's venturings into the bathroom remain of normal frequency.

Fermentation Station
I am starting to settle into my kitchen routine more. I recently added this lovely shelving unit as my "Fermentation Station." It can be purchased for $80 (free shipping) at Costco.com

Recent favorite GAPS-friendly inventions include: Vietnamese pho, spaghetti, meat loaf, dairy-free cream of tomato soup, apple crisp, and dairy-free milkshakes. I don't have time to share them all here, but I've highlighted a few below.

Probiotic Non-Dairy Cream of Tomato Soup

Probiotic Non-Dairy Cream
of Tomato Soup
3-4 lacto-fermented roma tomatoes (I bought these organic tomatoes in bulk for about $1.30/lb during the season and fermented them in a 5L Fido jar with fresh basil and garlic)
Lacto-fermented Romas
1/2 c. fresh home-made raw almond milk
1/4 c. cold-pressed organic extra virgin olive oil
1 T. fresh herb of your choice (sage is good!)
Dash of pepper
1T. fresh herb, chopped finely for garnish

Place all ingredients in the blender and blend until completely creamy and smooth. If you have a Vitamix, blend until warm, but not hot, as we want to maintain the probiotic value of the lacto-fermented tomatoes. Pour into bowls and sprinkle herb on top for garnish. Eat cold or warm as desired. Serves 2.

GAPS-Friendly Spaghetti

I'm not very "up" on gadgets, so I had no idea that such a thing as a vegetable noodler even existed until a friend told me about them a couple months ago. 
Well, here it is, and as you can see, it works quite nicely on this yellow zucchini. I bought it on Amazon.com for about $35. To cook these noodles, you boil water as usual and then blanch them for 1-2 minutes. Strain and serve. I made a hearty spaghetti sauce to go with these.

1.3 lb. package organic ground beef
1 onion
3 cloves garlic
1-2 t. each of dried oregano, rosemary, marjoram, thyme, basil
10 ripe organic roma tomatoes
1/4 c. coconut or other high-heat oil.
Salt and pepper to taste


Brown the beef in a large skillet or pot with the oil and onions. Chop the tomatoes coarsely and add them to the pot. Add herbs, salt, and pepper. Cover with a splatter screen and boil on med-high heat until the tomatoes have turned to sauce and the sauce is thick to desired consistency. Spoon over zucchini noodles and serve. Serves 4.

Zucchini Spaghetti
Apple Crisp

4-5 organic apples, cored and thinly sliced
1c. raw almonds, ground to coarse meal
Apple Crisp
1/2 c. raw cashews, ground to coarse meal
2-4 T. raw honey
2-4 T. coconut oil
1-2 T. cinnamon

Place the apples in an 8x8-inch baking dish and sprinkle with cinnamon. Cut the almonds, cashews, honey, coconut, and remaining cinnamon together coarsely in a bowl using a fork. Sprinkle over the apples. Bake for 30-40 min or until desired crispness. Serves 6.

My Ginger Bug Grew a Scoby!


Yes, surprise, surprise, my ginger bug grew it's own SCOBY from scratch. This is really fun... At first I was concerned that maybe this was a bad sign, but it smells great, looks great, and tastes great. No hint of excessive yeasts, no mold. The culture remains active. I had a hard time finding any information about this online, but I did finally run across another blogger who reported a similar experience. You can see from the image above that there is a thin SCOBY film on top of the ginger culture (notice the healthy bubbling action too!). In the picture below, you can see the translucent SCOBY from the top (slightly reflective and shiny in appearance). It is still thin, but I anticipate it will continue to grow.

I have changed my ginger bug routine somewhat. When I first started it, I read that you had to feed it daily. However, some people said twice per day, some
once per day; some said add 1t. of sugar and ginger into 2c. of water, while others suggested 1T. of sugar and ginger into only 2T. of water... In short, there doesn't seem to be much consensus on what makes for a good ginger bug. So I decided to depart from convention and see how my bug would do if I didn't babysit it quite so closely. I have left it for up to 3-4 days without adding any sugar and ginger with no problems. I add about 1-2T. of sugar and 1-2T. of ginger every few days, and add some water when it looks like it needs it. When there gets to be too much old ginger, I just throw some of it out, and continue adding it every few days. About once every 7-9 days, I make ginger beer with a combination of ginger bug and kombucha as a starter. For this, I remove almost all the liquid from my ginger bug except about 1/4 c. or so (out of about 2-3 cups). Then, I add a cup or two of water, and 1-2T. of ginger and sugar to get things going again.

Monday, September 16, 2013

Kombucha Upgraded Again

I finally released my kombucha scoby into a 2-gallon size jar (I know, I talk about it like it's a beloved pet dog or something). I found this Anchor Hocking 2-gal. jar at Target for $13.79 - what a deal! Finally, room to grow!

I was so skeptical about kombucha when I started it six months ago. I really thought I would prefer water kefir. But, my water kefir died long ago of poor usage and neglect in my fridge, and my kombucha scoby is still going strong! One gallon wasn't enough to last us a week, so I added another half-gallon jar. Then one and a half gallons wasn't enough, so I finally got this two gallon jar. 

My scoby was about 2-3 cm thick before I split it up and gave a couple away recently. Now I'm starting fresh. I still do a rooibos/black tea mix and haven't discovered any reason why I should change this delightful combo. I drink it plain, I add it to juice or home-made banana "ice cream." I use it as starter for home-made sodas and ketchup. It has become the foundational culture in my kitchen.

For info on how to start your own kombucha culture, see Food Renegade's, "How to Brew Kombucha," "Kombucha, the Balancing Act", and "Bottling Kombucha Tea at Home." I bought my original kombucha scoby online from this seller on Etsy, and found her to be very reliable and the scoby to be very healthy. Just don't order during the hot summer months!

Content - WEEK 25/Full GAPS Diet

Breakfast with Grain-Free, Dairy-Free Dutch Baby
We are almost half-way through our first year on the GAPS regimen and continue to see good results... My husband's stools are mostly normal again, and my fatigue, abdominal pain, and other symptoms are greatly improved, though not yet "normal." So we continue to plug away and stick to the diet. 

I have been adding more fruit, but have found that we have to be very cautious about what kinds and how much fruit we eat. We do not eat real "desserts" yet either, even made with GAPS-friendly foods. Dessert for us consists of half an apple or peach, or a GAPS-legal muffin with a little raw honey on top. Occasionally, I will make an "ice cream" in our Vitamix, with frozen bananas mixed with other frozen fruit, like pineapple or berries. 

For a special breakfast, I have developed a GAPS-legal Dutch Baby, which is typically made with white flour and milk. It works great! See my recipe below.

Green Juice with Spirulina
I have also been vegetable juicing as much as possible within the confines of our food budget. I started adding spirulina powder to our juices, since I discovered that it is a complete protein containing all the amino acids, as well as a good source of iron, calcium, B vitamins, and fatty acids like GLA, ALA, LA, SDA, EPA, DHA, and AA (if you can trust Wikipedia's research, article here), all of which are essential supplements for GAPS patients. It doesn't taste the greatest, but a tablespoon or so mixed in with some juice isn't so hard to get down. I bought my spirulina from Star West Botanicals on Amazon.com, but Mountain Rose Herbs also sells it. I wasn't able to find any that is produced in the USA. The one I got is from China (supposedly "organic," but who really knows); and the one that Mountain Rose Herbs sells is from India (also supposedly "organic," but again, who really knows).


Grain-Free, Dairy-Free Dutch Baby

1 c. water
1/2 c. raw almonds plus 1/2 c. 
4 eggs
3 T. coconut oil
1 apple, chopped - optional
1 t. cinnamon - optional
Lemon wedges to squeeze on top - optional
Honey to drizzle on top - optional

Place the coconut oil in an 8x8-inch bake dish and stick in the oven at 400F. While the oil is melting and heating, place the water and 1/2 c. of the almonds in a Vitamix or blender. Blend on variable 10 for 2 minutes. Add remaining almonds and oil. Blend on variable 10 for another 20-30 seconds. Pour into the hot bake dish. If desired, sprinkle chopped apples and cinnamon over the batter. Bake for about 25-30 minutes until golden on top and springs back to touch. Serve and eat immediately. Drizzle with lemon juice and honey if desired. Makes: 4 servings (or two if you are big eaters like us!).

Lacto-fermentation Under Control: Lessons Learned

A few posts ago, I shared my troubles with learning how to do lacto-fermentation safely. I did some more research and reading others' experiences online, and concluded a couple things: 


  1. Don't use a starter culture. Apparently, this disturbs the fermentation process of the naturally present lactobacilli, which we want to favor in our pickled veggies.
  2. An air-tight, or nearly air-tight environment (with accommodation for gas release) is not just nice, but necessary, for safe fermentation.
With these lessons in my pocket (and with the help of Nourishing Treasures' research here), I purchased a bunch of Bormioli Rocco Fido canning jars from Sur la Table, and some of the large glass lacto-fermentation weights from Cultures for Health. For starters, I got two jars each of the 0.5L, 0.75L, 1L, and 2L jars, and one each of the 3L and 5L jars. However, I've found that I have a greater need for the large jars than the small ones, so I recently ordered a second jar of the 3L and 5L size. Shipping was free, so total cost of the jars was about $80 (for 12 jars!), which is a huge discount compared to investing in the Pickl-It variety. The glass weights from Cultures for Health are not that great... They are too small, so that many are needed for the larger jars. Also, they are not heavy enough unless you use a lot of them. However, it is nice to have a few around for the smaller ferments. For the larger things, or when I run out of weights, I just use a half-pint Ball canning jar to keep the veggies under the brine instead. This actually seems to work better than the weights...

So, I have been pickling like crazy since I got my new system in place, and with great results! Below are a few of my recent successes:

Golden Beet Kvass

Getting Started, Day 1

Finished Product, Day 32
I used a helpful recipe from Pickle Me Too! to guide me in making my first batch of beet kvass. I used golden beets and ginger in a brine of about 1T. salt per quart. It cultured for 3 weeks in the dark. Then I bottled it. One bottle I left plain, and to the other I added the juice and zest of one lemon, and let it culture for a few more days before drinking. It turned out... Ok, but not great. I'm not experienced with kvass, so maybe I just didn't know what to expect. To me, it still tasted too salty for a beverage - that was the major turn-off really. Otherwise, the flavor was sweet and citrusy. I think a little mint might be nice in the second ferment... Hmm, maybe next time. I drank it, but I just wasn't crazy about it. Also, I know some people eat the beets from their kvass, but I found most of mine pretty spent and kinda gross tasting. I ate a few of the more crispy ones, but I had to throw the rest away.

Lacto-fermented Salsa

Salsa
This turned out great! My husband especially loved it, slathering it on his scrambled eggs every morning. Because of the high sugar content of the tomatoes, salsa can only be cultured for 5-7 days before beginning to turn alcoholic. I did this one for 5 days. This one was made with grape tomatoes, onion, serrano pepper, basil, lemon juice and zest. I made a second sals this past week made with roma tomatoes, garlic, cilantro, and whole dried red peppers. Both turned out really good, and passed the husband test!

Shredded Ginger-Lemon
Carrots w/ Daikon

Shredded Ginger-Lemon Carrots with Daikon

Yum! Another winner. My husband loved this. It had a really crisp, refreshing flavor. It was gone in just a couple days. Shredded carrots, daikon radish, ginger, lemon juice, and lemon zest with just a little 3T. per quart salt brine.

Kimchi


Kimchi
This was one of my favorite ferments so far. I used a recipe from Nourished Kitchen to guide me, but as usual, I didn't follow it exactly. I used one head napa cabbage, one bunch green onions, one very large daikon radish, about a pound of carrots, about four serrano peppers, ginger, garlic, and a little sugar. I didn't make it very spicy for my first try, since we have not been eating spicy foods for a long time, and have just started adding a little bit of pepper here and there. This was in a 5L jar, about 2/3 full, and it was gone in just a week or so.


There were a few other ferments that I did as well - green beans, cucumber pickles, and beet green kimchi. The beet greens did not turn out very good, and were my least favorite. But I'm sure they were good for us, and I didn't want to throw them away! 


My Ferments Shelf - Getting Full!


My conclusion: The Fido jars have performed dependably so far, with much fewer problems. They are definitely worth it, an inexpensive and reliable way to go! The only problems I've had was 1) with a jar of been green kimchi, which got contaminated due to the fact that I filled the jar too full, and it overflowed and had to be opened and cleaned, thus exposing it to air and other contaminants... and 2) with a small amount of kahm or mold (couldn't quite tell which) that grew on top of my most recent salsa. I was able to scrape this off without a problem and save the ferment. I think this developed only because I opened this jar during fermentation to stir it, since the tomatoes do float to the top, and there is no really good way to weight them down. However, if the jars are left closed, they should be airtight, and should not have as much necessity for weighting. I've found this to be true for other "floaters" I've done so far.

Projects Ginger Bug & Root Beer: Success!

In my previous post, I discussed how my first ginger bug try had failed and so I was trying a new recipe. Well, it worked! I made a batch using the ginger bug starter, as well as a batch using kombucha as the starter, to test them side-by-side. And... I couldn't really tell the difference. As far as I see it, the main advantage of the ginger bug is that it makes a super-concentrated gingery flavor, which is great if you like your ginger beer nice and spicy.  But as a starter culture for soda, I am somewhat ambivalent about the bug. Sometimes it performs well and creates a nice fizz. Other times, it turns out completely flat. It's been very unpredictable for me. I've found that kombucha used as a starter performs much more consistently, making a great fizz every time. My conclusion: It is worth keeping a bug around to create the flavor, but I wouldn't rely completely on my bug for starter, but would add a little K-tea as well if you want any fizz.


Homemade Root Beer
I also mentioned in my last post that I was hoping to try homemade root beer soon. Well, here it is (pictured left)! I used K-tea for the starter so far, and I'm still figuring out just how little starter is needed to get this soda fizzy without exploding when I open it. So far, I can't seem to get the proportions quite right, and I have to open this one in the sink very carefully or else I will be cleaning root beer off my refrigerator at the opposite end of the kitchen 10 feet away! Or the ceiling... Both of which we did this past week... I'm not sure what it is about this brew, but the K-tea absolutely loves it, and goes wild. A note about the flavor: if you are expecting it to taste like what you buy in the store, you will be disappointed. This has a much more complex, robust, and earthy flavor than that wintergreen-cornsyrup stuff. It took a little getting used to at first, but I really like it!  I based my recipe on the one from Nourished Kitchen, but I decreased the licorice root to half, and skipped the sassafras. My husband doesn't like the anise after-taste of the licorice, and sassafras was not readily available when I bought my herbs. The rest of the herbs I bought either at Mountain Rose Herbs or Amazon.comMy conclusion: Homemade root beer made using k-tea as a starter works great, but less than 1/4 c. of k-tea should be used per 17oz. bottle, or it will over-carbonate.

Friday, August 2, 2013

The Best Gingery Ginger Brew

The Gingeriest Ginger Brew
My husband and I have been on a best gingery ginger brew search for a while now. We never expected to discover our favorite brew while on a restricted diet for our health! I am new to ginger brewing, but now that I've got the kombucha and water kefir down, I decided it was time to explore the world of ginger bugs. I got my recipe for ginger bug from Nourished Kitchen; however, it didn't "take" the first time. It is supposed to get frothy and bubbly after a few days from the yeast. When you have fed it for five days or so, you can use it as a starter to make the brew. You combine it with sweet tea of some sort (I have used a combo of fresh ginger and rooibos so far) and bottle it in a grolsch-style bottle to hold in the CO2 and create a natural carbonation. It sits out and continues to culture for a few days before it goes into the fridge for consumption. 

My first try pictured to the left did
Ginger Bug First Try - Flop!
not get it's bubbly activity like normal. After a week of feeding the "bug" that wasn't bugging, I gave up. However, instead of wasting all that good sweet gingery juice, I strained it out and combined it with rooibos, fresh lemon juice, and kombucha and bottled it. This seemed to make a great brew - no complaints! However, I do want to make this ginger bug thing work, so I read a bit more online and found some good tips and a new recipe from Wellness Mama. Apparently, a ginger bug should not be stored next to other cultures or it can experience cross-contamination and fail. There is also a debate about whether the ginger skin should be removed or used. Some people believe that peeling the skin removes too much of the natural lactobacilli which is needed for the culture. 
Ginger Bug Second Try - Bugging!

The new recipe I found calls for more water and less ginger and sugar added on a daily basis, which is also more economical, so I'm happy to give it a try. My new ginger bug got a new (larger) jar, a new cover (coffee filters), and a new spot to sit in (on top of the fridge). It is now on day three and it is bugging! I can start to see some bubbling and foaming on top of the water, which makes me excited. This one needs at least eight days of culturing before it will be ready to brew, so keep tuned and I'll let you know how it goes! After I conquer ginger brew, I plan to expand my horizons to home-brewed root beer.

By the way - the grolsch bottles are a new investment for me and they are awesome! Definitely worth it. I got them here. I split a case with a friend to get them cheaper.


Lacto-Fermentation Foibles

Well, I've had some really great fermentation successes since I started, as well as some really awful fermentation messes! These dill pickle spears made with cukes from my garden turned out A+! And I showed you some kefirkraut success in a previous post. I began fermenting with mason jars, using the plastic baggy with water method to weight down the veggies. Recently, I fermented a few pickled veggies without a weight, and experienced some bad batches. Yes, this was careless of me. But I am living and learning with this probiotic food thing! I found a great blog post from Nourishing Treasures demonstrating the most reliable way to pickle safely. I also found some information about how to judge pickle safety when you experience unexpected outcomes.

After the last couple flops (shown below), I was really understanding the importance of knowing what you are doing with lacto-fermentation. It is obviously not good for someone with gut dysbiosis to be eating bad yeasts and bacteria that have contaminated their cultures! Convinced that safe fermentation is something that I need to learn, and learn well, for the rest of my life, I was ready to dish out the big bucks and invest in Pickl-It jars. I had read a glowing review of them on the Pickle Me Too! blog, and figured that I should just bite the bullet view it as a life-time investment in our health. However, the "Sauerkraut Survivor Final Report" from Nourishing Treasures saved my wallet from this financial catastrophe. I settled for simple Fido jars (for which I got free shipping!) and glass weights. I just received my weights today and am anxiously awaiting my jars. I hope to do a review of them before long with some kimchi.


Lemon dill pickles just getting started - so far, so good! They were so packed in there that the brine was covering them just fine to begin with.


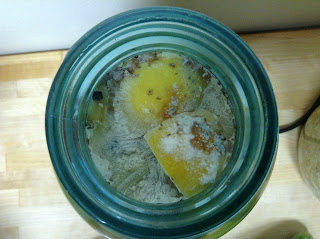
What happened?! Yuck. Obviously some mold of various species (not good!!) and some kahm yeast (the white scum floating on the brine, which is said to be harmless). As the pickles fermented, the gasses from fermentation caused them to float to the surface and get exposed to the air. I get the stuffed jar method is not reliable after all...


White sediment at the bottom of the jar. This is also said to be harmless yeasts by my web sources, but I found that most of the pickles were slightly slimy, indicating that either there were some slime-producing bacteria present (again, not good!!). I had to throw this batch of precious home-grown garden veggies away. Boo-hoo!


This batch of kraut got some kahm growing on top, which wasn't ideal, but I was able to skim it off and still eat it. Turned out pretty good.

Grow a Garden! It's Good for You!


Gardening, I read recently, is good for depression. No surprise to me! I always feel happier after being in my garden. It is one of the most relaxing and rewarding pastimes. Yes, it is a lot of work. But it's also  a lot of relaxation at the same time. As I sniffed a waft of tomato smell in my garden this morning, it was absolutely therapeutic!

It is not only good for your spirits, but also for your health. You can grow your veggies organically, let them fully ripen and mature before picking, and eat them within hours.

What does it take? A little space, and little money, and a little work. That's it!

You can afford to garden, I promise. I started my garden with $30, determination, and a little elbow grease. I bought $30 worth of seeds. I got a load of free compost from someone on Craigslist who needed to get rid of it. I got a few free wooden pallets on Craigslist. I got some free rabbit manure... yes, on Craigslist, of course! I borrowed some garden tools from friends, and started digging.

My little plot is about 45 square feet. I planted 3 hills of cucumbers, 3 hills of squash, 3 tomatoes, and 3 rows of green beans (1 long, and 2 short). I have already gotten back much more than $30 worth of fresh garden produce despite some pest attacks. Way worth it!

Marigolds planted in the pallet spaces around the garden to help deter certain garden pests

These turned into some really yummy probiotic pickles!

Herb pot garden - basil, thyme, sage, mint, and oregano (indoors)

Don't forget some flowers!

And, of course, if you can't have an outside garden, you can at least have a sprout garden (using the Victorio seed sprouter here)!

How to Afford Organic Produce WITHOUT Breaking Your Budget


Well, our food budget is soaring out of control since starting the GAPS diet. Especially in the introductory phases when you are limited to meat and veggies and are feeling ravenously hungry all the time due to carb cravings, you can go through organic groceries (and money) like crazy! I realized this month, as I overspent my budget by over a hundred dollars, that we couldn't keep this up. 

So I went searching for another way. I looked at all the CSA's in my area, but most of them are just as expensive as the grocery stores, or even more. And you don't get to pick and choose what you get, which is no good on a restricted diet. The farmer's market in my area is exorbitant - they should be charged with extortion, seriously. And most of the farmers there aren't even organic. There has GOT to be another way to get discount produce, I thought. I mean, where do the grocery stores get it from? They must charge us 200% more than they pay for their produce, so where do they get it?

After a number of hours spent online, I finally found what I believe to be a viable option. I located a wholesale produce supplier in our area that sells to cash customers on the side. Jackpot! Not all wholesale produce warehouses stock organic produce, so you have to find one that does and that will sell to private customers. Our wholesaler happens to carry a large stock of organic produce items at about 50% less cost than in the local grocery store. Most items on the organic list cost $1.00-1.50/lb compared to $1.99-2.99/lb in the store.

BUT - you have to buy a truckload to get it! Not literally, thankfully. But most items do come in large quantities. 100 apples, 60 avocados, 8 pounds of strawberries, 10/4lb bags of navel oranges, 25lb of red beets, 20lb of broccoli crowns, 25lb of carrots, 30ct of celery, 1lb of mint leaves, 24ct lettuce heads, 5lb of mushrooms, 40lb onions, 4lb spinach, 35lb butternut squash, 15lb tomatoes, 10/5lb bags of potatoes, etc, etc.

Now in my mind I was picturing myself with a 60oz. glass of fresh juice the size of my head three times a day, and I was drooling. But, in reality, there is no way I could go through all that produce in time without it going bad, or even have the room to store it - unless I wanted to eat only beets for two weeks straight, then only avocados for the next two weeks, etc... Umm, no. So I set my energy to figuring out how to get my hands on all this yummy cheap produce - realistically. The answer: form a private mini "co-op." Get a few GAPS or paleo friends together, put together a list of what we want to split every couple weeks, pick it up and split it! Simple, right?

Yes, not too complicated, but it does take some time and thought to organize it. It will save me some of my grocery shopping, which saves some time. But it takes quite a bit of time to obtain the weekly price list, disperse it to friends, get the friends to give you their list of desired food, figure out what we can agree to split that week or two, and then compile the list, place the order, pick it up, transport it, split it into shares for each family, have them pick it up from you, receive their reimbursements, etc. 

What the heck! Eating is my part-time job right now, I figure. And, if time is money, think of all the money I'm saving by spending an extra bit of time on this. Decreasing my produce budget by 50%! That's worth about $150 per month in my house right now. So if I spend about 3 extra hours on produce shopping every 2 weeks, about 6 hours per month, then I'm basically being paid $25/hr for my effort. Not bad, I say! If you have a large family, you will be saving even more. If your budget is twice ours for a family of 4-5, then you will be saving $50/hr for your time.

So let's talk logistics.

I've done it for a number of months now. I created a Google Group forum where my wholesale produce "co-op" communicates with each other about what we want to get and split. I posted the organic produce stock list online and I update it before each order so that my friends can look over it. I created an online spreadsheet where I keep track of what each person owes me for their portion of the order. I give my friends a deadline for their order, pick it up once per month, divvy it up, and they pick it up and pay me. We share gas costs for pick up based on what percentage of the order was ours (If I bought 60% of the order, then I pay 60% of the gas). I have been spending about $200-250 on produce once a month with this "co-op." Not bad. I try to keep our produce budget under $300 per month. 

When I bring the food home once a month, I dedicate my afternoon to processing it. I max out our fridge, and then start cleaning, chopping, and freezing whatever will not fit. I make home-made applesauce or pearsauce and freeze it. I freeze ripe bananas for baking (or banana "ice cream"!) and pineapple spears for juicing. By the time I'm done, both our freezer and fridge are pretty stuffed. But I have been able to do this with just an average-size fridge.

We have certainly been able to eat a lot more veggies in general this way; and a LOT more avocados than we would have been been able to by shopping at Whole Foods, Trader Joe's, and Costco. I still get occasional items from other stores if I want to use something that I don't want to buy in bulk.

The herd mentality works well for buying other  bulk food items as well. Try it with organic raw almonds (Living Nutz); herbs, tea, and spices (Mountain Rose Herbs and Amazon); totally raw honey and bee pollen (Walt's Swarmbustin' Honey); and fermented cod liver oil (Green Pasture).


Smiling - WEEK 19/Full GAPS diet

Well, I have obviously been busy living the GAPS life since it has been about three months since you've heard from me! We have progressed through intro diet stages three through six, gotten new jobs,  and moved to a new house. Whew!

I had to review my last update post which was WEEK 4 of the diet, when we were still in intro diet stage 2. Let me see if I can summarize what we've experienced since then:

WEEKS 5-8: In these weeks my husband experienced a moderate flare of his ulcerative colitis with recurring loose stools, abdominal pain, and rectal bleeding. In addition, he also continued to struggle severely with constant hunger and cravings. He was not always in the best mood (understandably), and felt like... crap. He lost weight, and at six foot and 145lbs, he did not have any to lose. He looked pitiful and I was super worried about him. I couldn't figure out what we were doing wrong. I made him go back to stage 1 for a couple days, then kept him on stage 2 for as long as I could, but his symptoms weren't subsiding no matter what I took away or added, and he was starving... I was a little confused, and couldn't find any good advice from someone who had been in his shoes. As far as I could tell, we were doing everything right. But it got to the point where he could no longer tolerate a strictly chicken soup diet, and I felt that the benefit of progressing him to stage 3 outweighed the risk of weight loss. With nutrients flying through him so quickly, he needed something more substantial. So we moved on, tentatively and slowly. He worked up to taking 250 billion of VSL#3 daily during this time. As for me, I was progressing smoothly, and still feeling progressively better. I started working (part-time) again for the first time in almost a year, which was huge progress!

WEEKS 9-13: During this time, we continued progressing slowly and cautiously through intro diet stages 3-6. My husband's flare died down, and he started experiencing significant improvements. His stools became fluffy to normal and he only had bowel movements 1-2 times per day. His extreme hunger and cravings continued. He ate like a beast! Of course, all this time we were continuing to drink broth daily with at least 1-2 meals. We also ate sauerkraut, drank kombucha, and took our probiotic supplements, fermented cod liver oil (Green Pasture), and omega 3-6-9 oil (recommend Udo's Oil). I noticed significant improvement in my skin after starting the cod liver and omega oils. My hands lost their dry, cracked look and became supple. My face took on a bit of a glow. Wounds to my extremities started to heal faster.

WEEKS 14-18: Continued improvement. We were now on the full diet, minus a few foods. I was slow about adding fruits, and had to remove a couple that I tried to add because of loose stools. We did vegetable juicing (in our Vitamix), and then started adding a little pineapple to our juice. I started making some fresh juice popsicles with carrot/pineapple juice for a refreshing dessert - yum! Started experiencing some improved symptoms that indicate an increase in my female hormone production. Yay! Also was sleeping better more consistently. Was feeling generally "well," with only occasional bouts of fatigue. My husband's extreme hunger and cravings began to subside. Again, Yay! His energy and mood improved. He started gaining back some weight that he had lost. Another Yay! He had a recurrence of some loose stools after gradually increasing his probiotic dose to 900 billion with help from the NORD VSL#3 Patient Assistance Program (for patients with ulcerative colitis or pouchitis only). However, still only having 1-2 stools per day, and NO bleeding (a good sign!).

WEEK 19: So here we are! Plugging along. Definitely SOLD on the GAPS protocol. We know we still have a long way to go, but we have seen such significant improvement in the past 3-4 months, that we are confident this is the way forward.


Example of a GAPS breakfast: Squash pancakes, scrambled eggs, boiled "sausage" patties, guacamole, kombucha, and broth.

Thursday, April 18, 2013

Kefirkraut Update

If you are wondering how the kefirkraut turned out, it was great! See?


It is half gone already. The flavor is great! The only thing I would do differently next time is NOT to layer the spices in the middle, but only put them on the bottom. They are annoying when you get to the middle... Oh, well. Live and learn.

Why Animal Fat is THE BEST! And How to Get It for Free

So, I have this really cool deal worked out with the meat department at Whole Foods where they save me some grassfed beef fat and bones for free every Thursday morning when they do their trimming. You might be thinking, "What in the world is she going to do with fat and bones?!" Why, make bone broth and lard, of course! Both highly called for on the GAPS diet, though apparently completely undervalued by the Western culture at large. In fact, I'm rendering 5 lbs of pastured beef fat as we speak (AKA - put it in the crock pot and wait for it to melt). How awesome is that?

But, don't we all know that animal fat is highly saturated and is supposed to be bad for our hearts and arteries and things? Think again. Dr. Natasha does a great job in her chapter on fats explaining the faulty science that started the saturated fat scare and why animal fat is actually the preferred source of energy for the human body.

Dr. Natasha says that the anti-saturated fat craze is "a result of the relentless efforts made by the food industry to fight their competition. What is their competition? The natural fats, of course. There is not much profit to be made from natural fats..." (ah-hem, excuse my interruption, but my free grass-fed beef fat is a case in point) "...while processed oils and fats bring very good profits" (Campbell-McBride, 2004, 2010). Dr. Natasha goes on to explain that "real science" is, and has always been, telling us that processed, hydrogenated fats and vegetable oils are the real heart-killers and that saturated fats are the real heart protectors.

Reasons animal fat is the best:
  1. It tastes great (can I hear an amen?!)
  2. Animal fat is the closest in fat composition to human breast milk, which, by the way, is comprised of a surprising 48% saturated fat, 33% monounsaturated fat, and 16% polyunsaturated fat. Humans thrive on saturated fat (Campbell-McBride, 2004, 2010).
  3. Eating fat does not make you fat. Dr. Natasha says, rather, "Consuming processed carbohydrates causes obesity. Dietary fats go into the structure of your body: your brain, bones, muscles, immune system, etc. - every cell in the body is made out of fats to a large degree" (Campbell-McBride, 2004, 2010). We can see that animal fats are the #1 choice of your body for providing the building blocks of brain cells, hormones, and performing many other functions.
  4.  Certain animal fats (like caviar, cod liver oil, egg yolks, butter, cold water fish, and lard) provide us with rich sources of cholesterol. Bad? Nope! Dr. Natasha explains, "The truth is that we humans cannot live without cholesterol... Cholesterol is an integral and very important part of our cell membranes... In many cells, almost half of the cell wall is made from cholesterol... The human brain is particularly rich in cholesterol: 25% of all body cholesterol is taken by the brain... Myelin coats every nerve cell and every nerve fiber... 20% of myelin is cholesterol... People who start losing their myelin develop a condition called multiple sclerosis. In my clinical experience, foods with high cholesterol and high animal fat content are an essential medicine for people with GAPS and multiple sclerosis... After the brain the organs hungriest for cholesterol are our endocrine glands: adrenals and sex glands." Wow! So my brain fog, adrenal stress, and PMS could all be partially a lack of lard in my diet. I can fix that!
Well, Dr. Natasha has a lot more to say about fats, but I can't repeat it all here. You will have to buy the book for yourself here.

So check with your local grocery's meat department to see if you can arrange your own fat deal with them. Bring it home and throw it in your own Brothpot or else put it in a large roaster in the oven at about 250 degrees fahrenheit for a few hours. When all the fat has turned to liquid, strain it through some cheesecloth, pour in a glass jar, and store in the fridge. It will keep for a long time.


Gotta love that "No Charge" in the upper right corner!


In the Brothpot and ready to be rendered!


After one hour on "high" and 1-2 hours on "low." Making progress.


References:
Campbell-McBride, Natasha, M.D. (2004, 2010). Gut and Psychology Syndrome. Cambridge, UK: Medinform Publishing.  p. 255-276.

Kombucha Upgraded

So I'm loving my kombucha! It is awesome! It tastes sweet and tangy and smooth. It is my personal favorite to water kefir.

I added some dried wild huckleberries to my 75% rooibos/25% CO2 decaffinated black tea last week, and it cultured fine. Added a touch of tart berry undertones to it. However, after increasing my batch from a quart to half a gallon last time, it still doesn't make nearly enough to last me until the next batch is ready. And I'm only drinking maybe 4-6 oz. total per day still, and my husband maybe 2 oz. So I moved my mushroom into a one-gallon jar this week. I used an empty old giant pickle jar that I swiped from my mother-in-law. The kind that you can get at wholesale bulk food stores like Costco or Sam's Club. It's a perfect size - for now anyway.

Some of my mushrooms are starting to meld together into weird shapes. In short, it looks pretty odd and very cool. And so easy. Just steep, add sugar, cool, place in jar and forget about it for a week. Repeat. How great is that!


New gallon-sized "baby" forming on top